


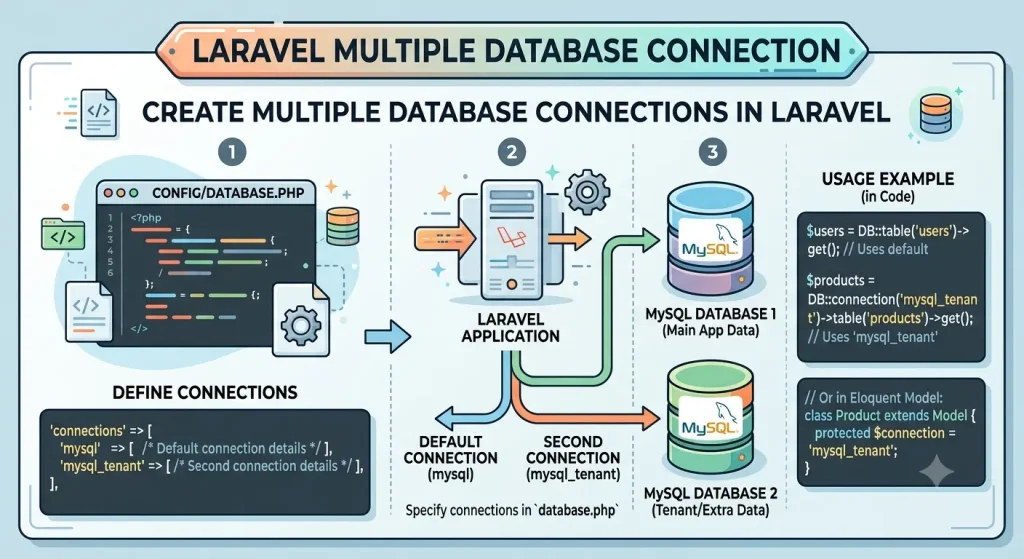
Laravel has built-in support for multiple database connections. This tutorial explains how to configure and use Multiple Database Connection in Laravel application in a simple way, especially for beginners. Think of each database like a separate notebook. One notebook may store users, and another notebook may store employees. Laravel can read from both notebooks if we tell it where each one is.
Prerequisites
- PHP installed
- Composer installed
- Laravel project created
- Access to two or more MySQL databases
Step 1: Configure Database Connections
Open the .env file and add the credentials for each database.
DB_CONNECTION=mysql

# Primary Database
DB_HOST=127.0.0.1
DB_PORT=3306
DB_DATABASE=main_database
DB_USERNAME=root
DB_PASSWORD=password

# Secondary Database
DB_SECOND_HOST=127.0.0.1
DB_SECOND_PORT=3306
DB_SECOND_DATABASE=second_database
DB_SECOND_USERNAME=root
DB_SECOND_PASSWORD=password
Simple explanation
The .env file is where we keep private settings like database names, usernames, and passwords.
Here, we are telling Laravel:
- use one database as the main database
- use another database as the second database
Step 2: Update config/database.php
Add a new connection inside the connections array.
'connections' => [

    'mysql' => [
        'driver' => 'mysql',
        'host' => env('DB_HOST', '127.0.0.1'),
        'port' => env('DB_PORT', '3306'),
        'database' => env('DB_DATABASE', 'forge'),
        'username' => env('DB_USERNAME', 'forge'),
        'password' => env('DB_PASSWORD', ''),
        'charset' => 'utf8mb4',
        'collation' => 'utf8mb4_unicode_ci',
        'prefix' => '',
        'strict' => true,
    ],

    'mysql_second' => [
        'driver' => 'mysql',
        'host' => env('DB_SECOND_HOST', '127.0.0.1'),
        'port' => env('DB_SECOND_PORT', '3306'),
        'database' => env('DB_SECOND_DATABASE', 'forge'),
        'username' => env('DB_SECOND_USERNAME', 'forge'),
        'password' => env('DB_SECOND_PASSWORD', ''),
        'charset' => 'utf8mb4',
        'collation' => 'utf8mb4_unicode_ci',
        'prefix' => '',
        'strict' => true,
    ],

],
Simple explanation
This file tells Laravel how to connect to each database.
mysqlis the default connectionmysql_secondis the new connection we added
So now Laravel knows there are two different databases available.
Step 3: Using Multiple Database Connections
This is the part that may feel confusing at first, so let’s make it very simple.
What is happening here?
When you write:
$users = DB::table('users')->get();
Laravel uses the default database.
When you write:
$employees = DB::connection('mysql_second')
    ->table('employees')
    ->get();
Laravel uses the second database.
Easy way to understand it
Imagine you have two classrooms:
- Classroom 1 = main database
- Classroom 2 = second database
If you want to ask a question in Classroom 1, you go there normally.
If you want to ask a question in Classroom 2, you must say which classroom you want.
That is exactly what DB::connection('mysql_second') does. It tells Laravel:
“Use the second database for this query.”
Query the Primary Database
$users = DB::table('users')->get();
This gets data from the main database.
Query the Secondary Database
$employees = DB::connection('mysql_second')
    ->table('employees')
    ->get();
This gets data from the second database.
Beginner tip
If you are just starting, remember this simple rule:
- no
connection(...)= default database connection('mysql_second')= second database
Step 4: Create Models for Different Databases
Models help us work with database tables in a cleaner way.
Primary Database Model
class User extends Model
{
    protected $table = 'users';
}
Secondary Database Model
class Employee extends Model
{
    protected $connection = 'mysql_second';

    protected $table = 'employees';
}
Usage:
$employees = Employee::all();
Simple explanation
A model is like a helper class for a table.
Usermodel works with the main databaseEmployeemodel works with the second database because we told it to usemysql_second
So when you call Employee::all(), Laravel knows which database to use.
Step 5: Running Migrations on a Specific Database
Create a migration:
php artisan make:migration create_employees_table
Run migration on the secondary database:
php artisan migrate --database=mysql_second
Simple explanation
A migration is like a set of instructions for creating or changing a table.
If you want the table to be created in the second database, you must tell Laravel to use that database with:
--database=mysql_second
Step 6: Transactions on a Specific Database
DB::connection('mysql_second')->transaction(function () {
    DB::connection('mysql_second')
        ->table('employees')
        ->insert([
            'name' => 'John Doe'
        ]);
});
Step 7: Example Controller
namespace App\Http\Controllers;

use App\Models\User;
use App\Models\Employee;

class DashboardController extends Controller
{
    public function index()
    {
        $users = User::all();

        $employees = Employee::all();

        return response()->json([
            'users' => $users,
            'employees' => $employees
        ]);
    }
}
Simple explanation
This controller gets data from both databases:
User::all()gets users from the main databaseEmployee::all()gets employees from the second database
Then it sends both results back as JSON.
Best Practices
- Use separate models for each database.
- Store credentials only in the
.envfile. - Use meaningful connection names.
- Avoid cross-database joins when possible.
- Use database-specific transactions.
- Test connection failures and error handling.
Beginner tip
If you are new, start small:
- first connect to one database
- then add the second database
- then test queries one by one
This makes it much easier to understand.
Troubleshooting
Connection Not Found
Database connection [mysql_second] not configured.
Verify that the connection name exists in config/database.php.
Authentication Errors
Access denied for user.
Check username, password, and database permissions.
Configuration Cache Issues
After changing database configuration, run:
php artisan config:clear
php artisan cache:clear
Conclusion
Laravel makes it easy to work with multiple MySQL databases by defining multiple connections in config/database.php and selecting the desired connection using models or the DB facade.
For beginners, the main idea is simple:
- one Laravel project can talk to more than one database
- each database needs its own connection name
- you choose the database by using that connection name
This is useful for multi-tenant applications, legacy database integrations, and data separation requirements.